Learn how to create a warm, tropical look inspired by the HBO TV series “The White Lotus” (Season 3). We’ll use RGB curves to craft this color grading, demonstrating how you can achieve professional results with minimal adjustments. Let’s get started!
Warm Tropical Look Made with RGB Curves
Here’s a before and after comparison of the warm color grading. Most of this is done with the RGB curves.


Here’s a screenshot that we will be using as a reference.

Tutorial Resources
Download the tutorial image to follow along:
Step 1: Adjust the Blue Channel
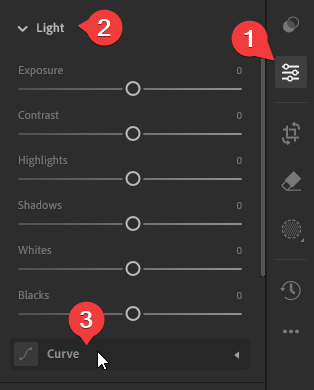
We’ll start by adjusting the blue channel in the RGB curves for warmth. Go to the Curves tool (Edit > Light > Curve).
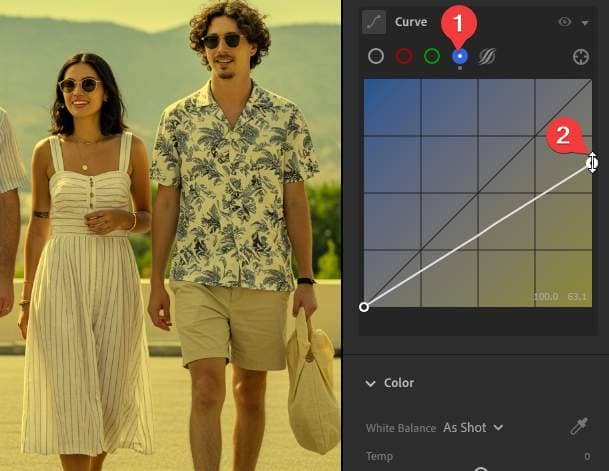
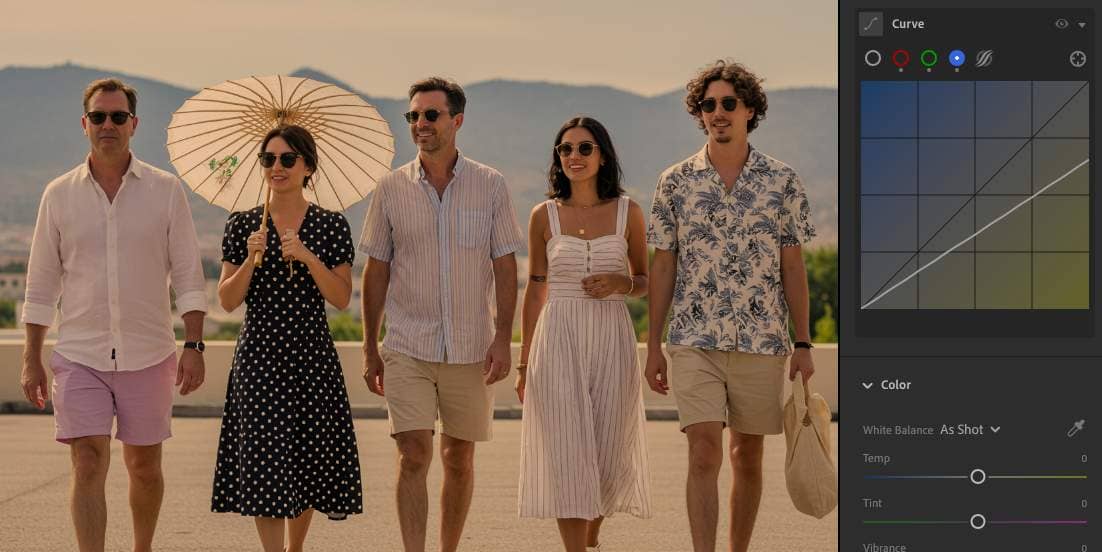
Switch to the blue channel. Drag the top-right point downwards by about two-thirds. This introduces a yellow tint to the highlights.
Step 2: Adjust the Green Channel
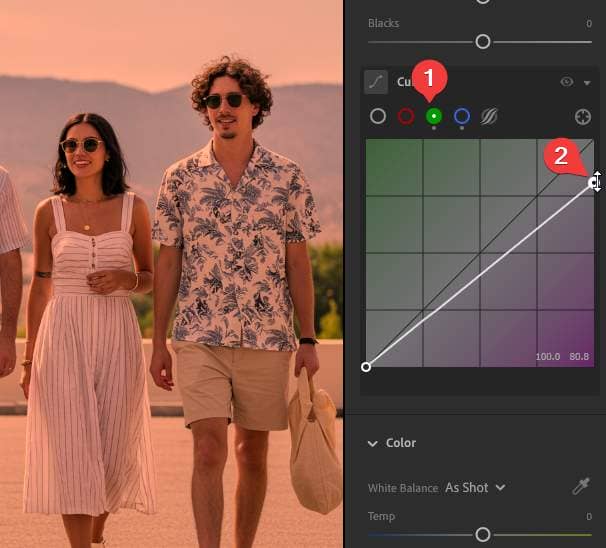
Switch to the green channel and slightly drag the top-right point down. It will look pink, but don’t worry about getting the right shade because we’ll be fine-tuning this later.
Step 3: Adjust the Red Channel
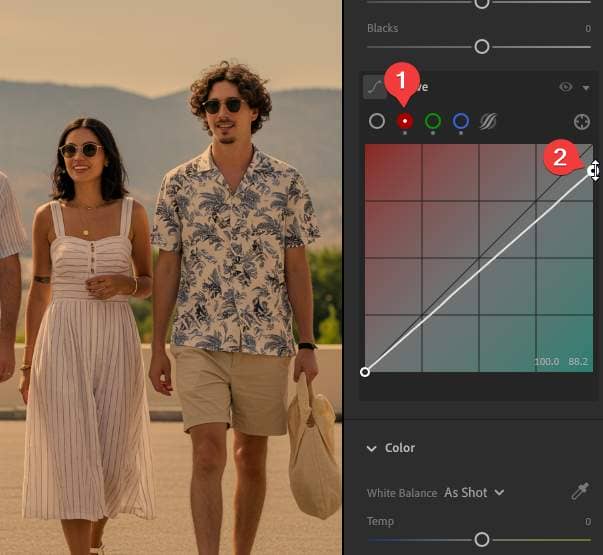
Then, do the same with the red channel, this time only down half as much.
Step 4: Fine Tune the RGB Curves
It’s difficult to get the RGB curves right on your first try. Go back into each channel and fine-tune the points as needed. Here’s what the colors of your image should look like.
Step 5: Adjust the Point Curve
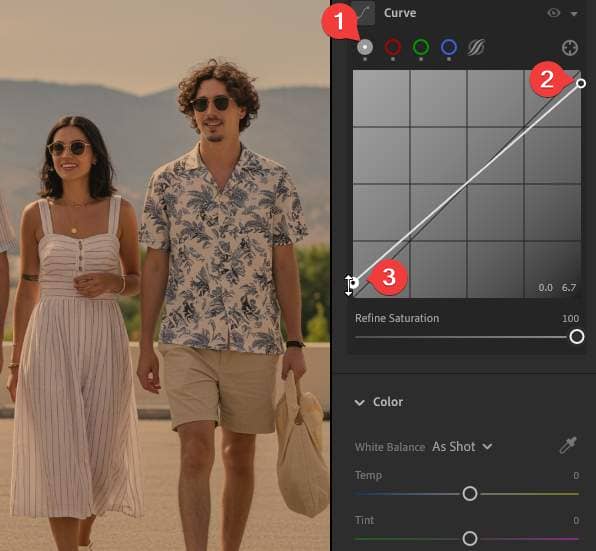
Now we will adjust the tones using the Point Curve.
- Select the Point Curve channel.
- Drag the top-right point slightly downwards.
- Drag the bottom-left point slightly upwards.
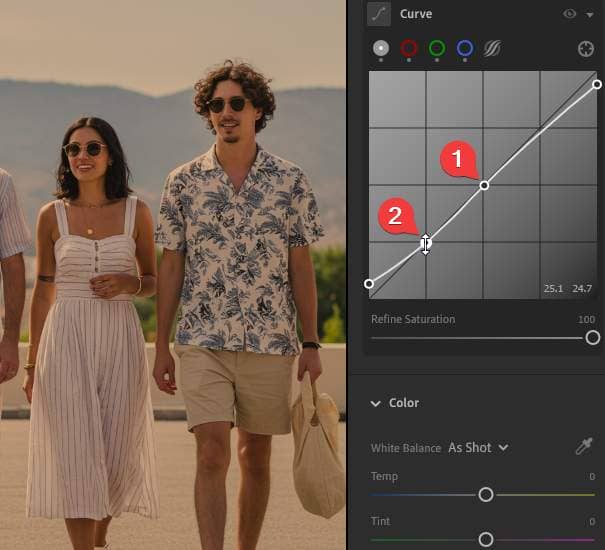
We will also use the same Point Curve to add contrast.
- Add a point in the middle.
- Add a point 1/4th of the way from the left and drag it downwards very slightly.
Step 6: Adjust Green Foliage
Even though our reference lacks foliage, “The White Lotus” features darker greens. Go to the Point Color tool (Color > Point Color) and click on the eyedropper tool.
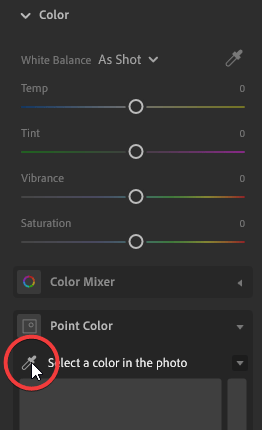
Sample a light yellow-green area.
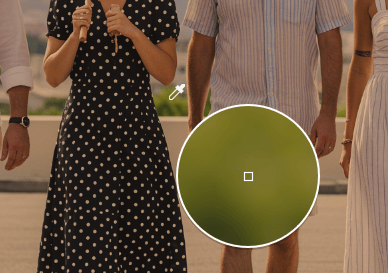
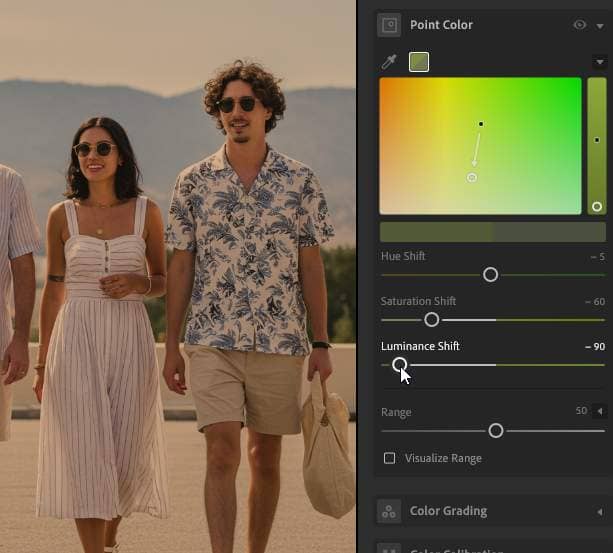
Adjust the settings to the following:
- Hue Shift: -5
- Saturation Shift: -60
- Luminance Shift: -90
Step 5: Simulate Telephoto Lens Blur
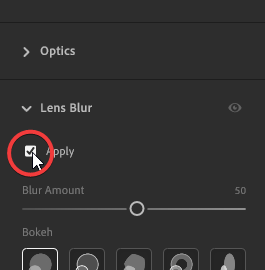
Now we will mimic a telephoto lens blur for depth. Go to the Lens Blur section and check the “Apply” setting.
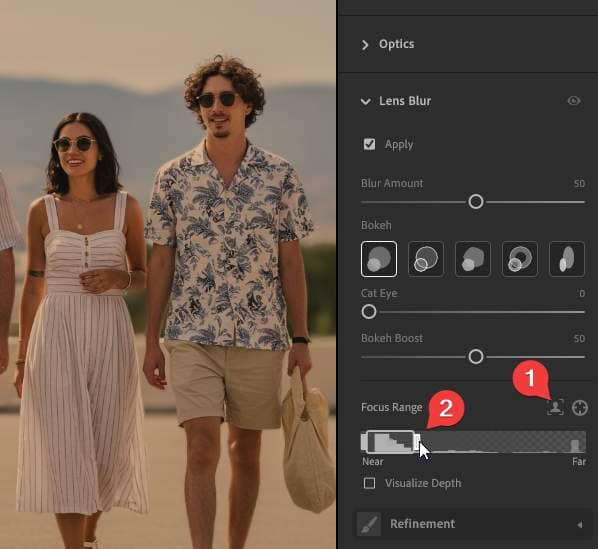
Next, click the person icon to auto-detect focus range. Drag the right side of the focus range left for dramatic separation without excess blur.
Final Results
You’ve now mastered a warm, tropical look using RGB curves! This tutorial shows that many color grading techniques need minimal adjustments for stunning results.





Leave a Reply