In this Lightroom tutorial, you’ll learn how to create a film look for wedding photography. You’ll start by adjusting colors to simulate the light and airy look of typical wedding presets, create whiter whites, increase contrast, and add film-like grain. A free wedding film preset is available to download at the end of the tutorial.
Preview of Final Results

Step 1
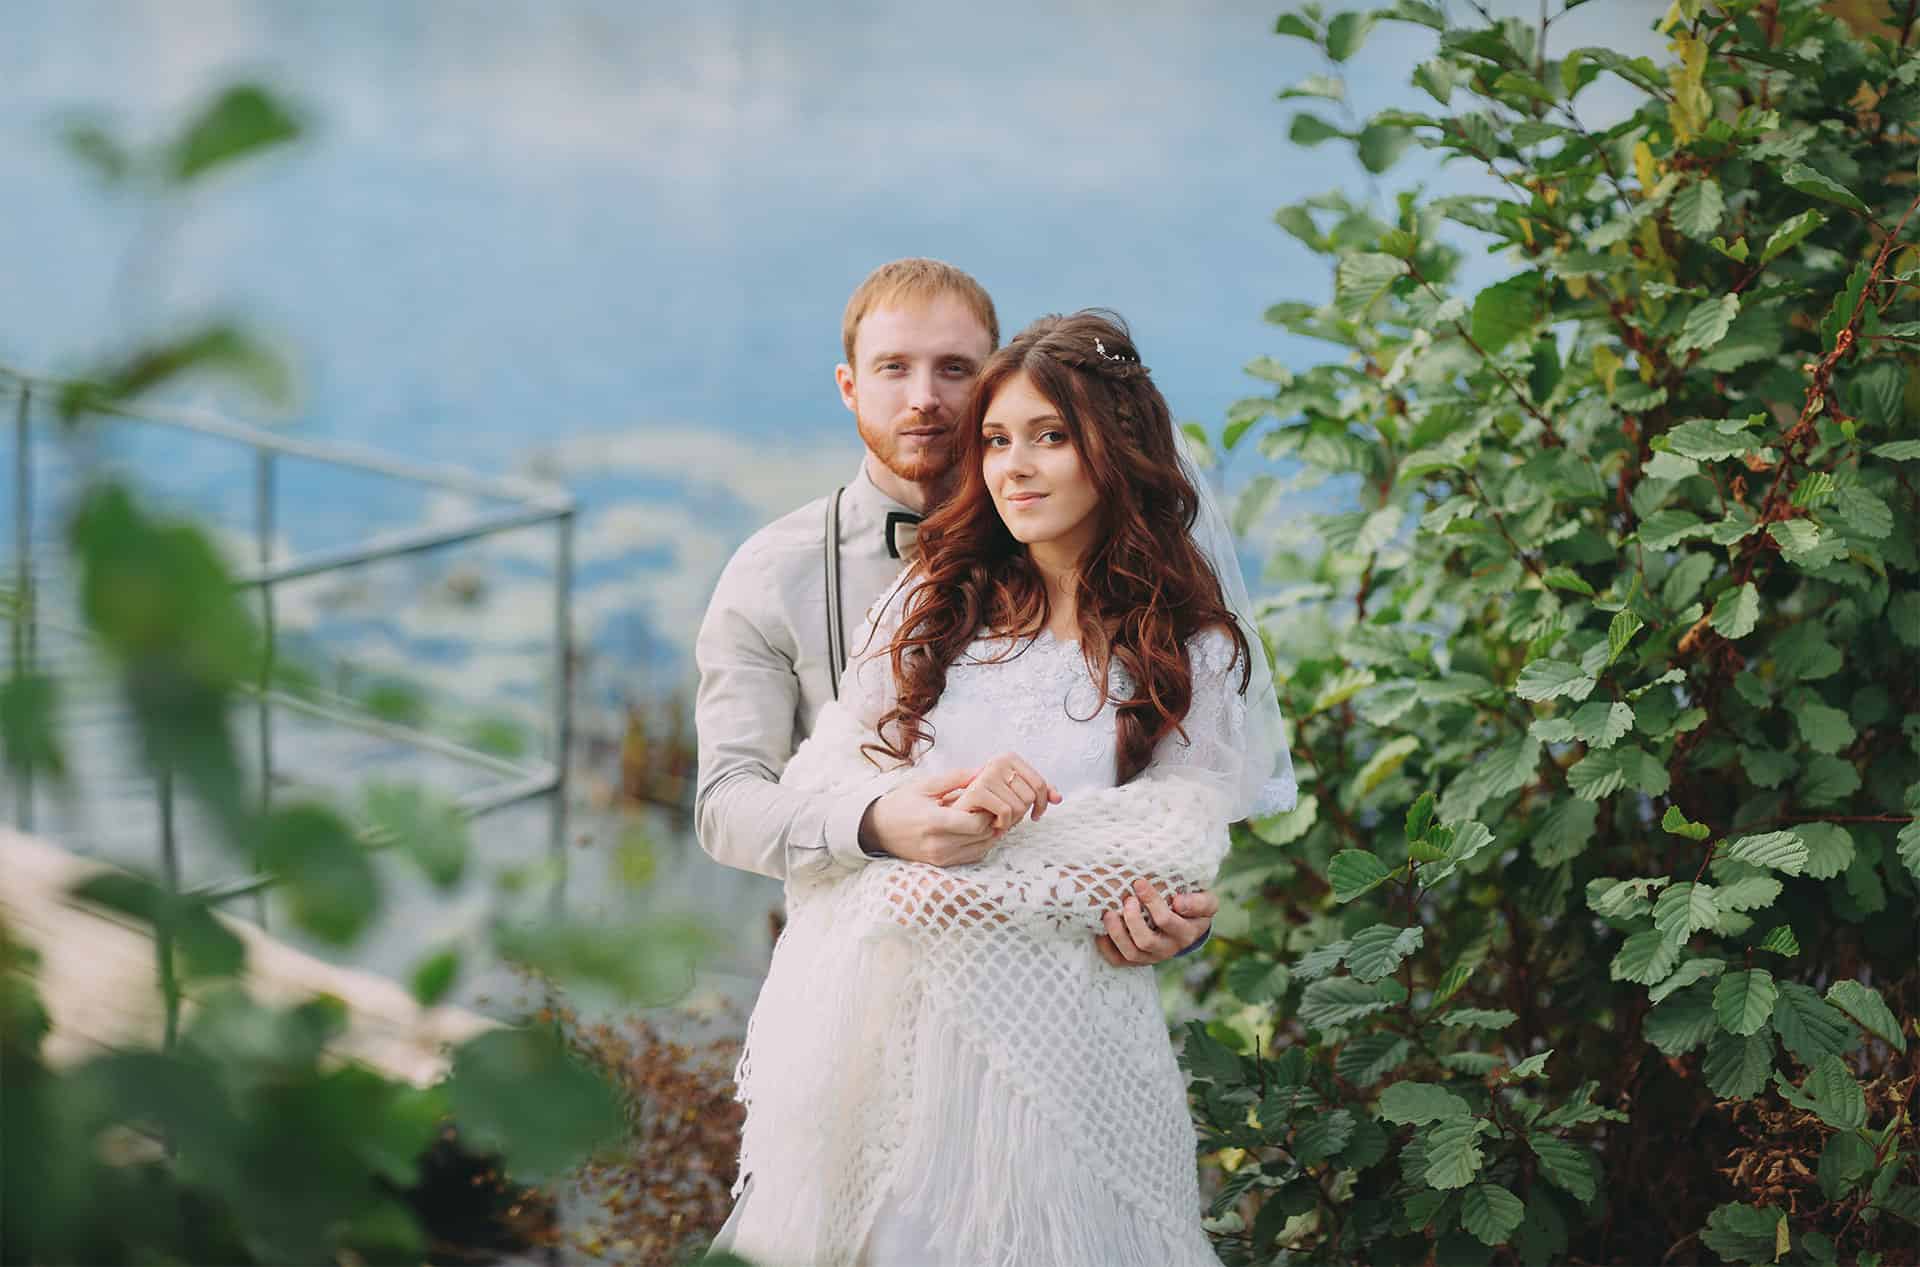
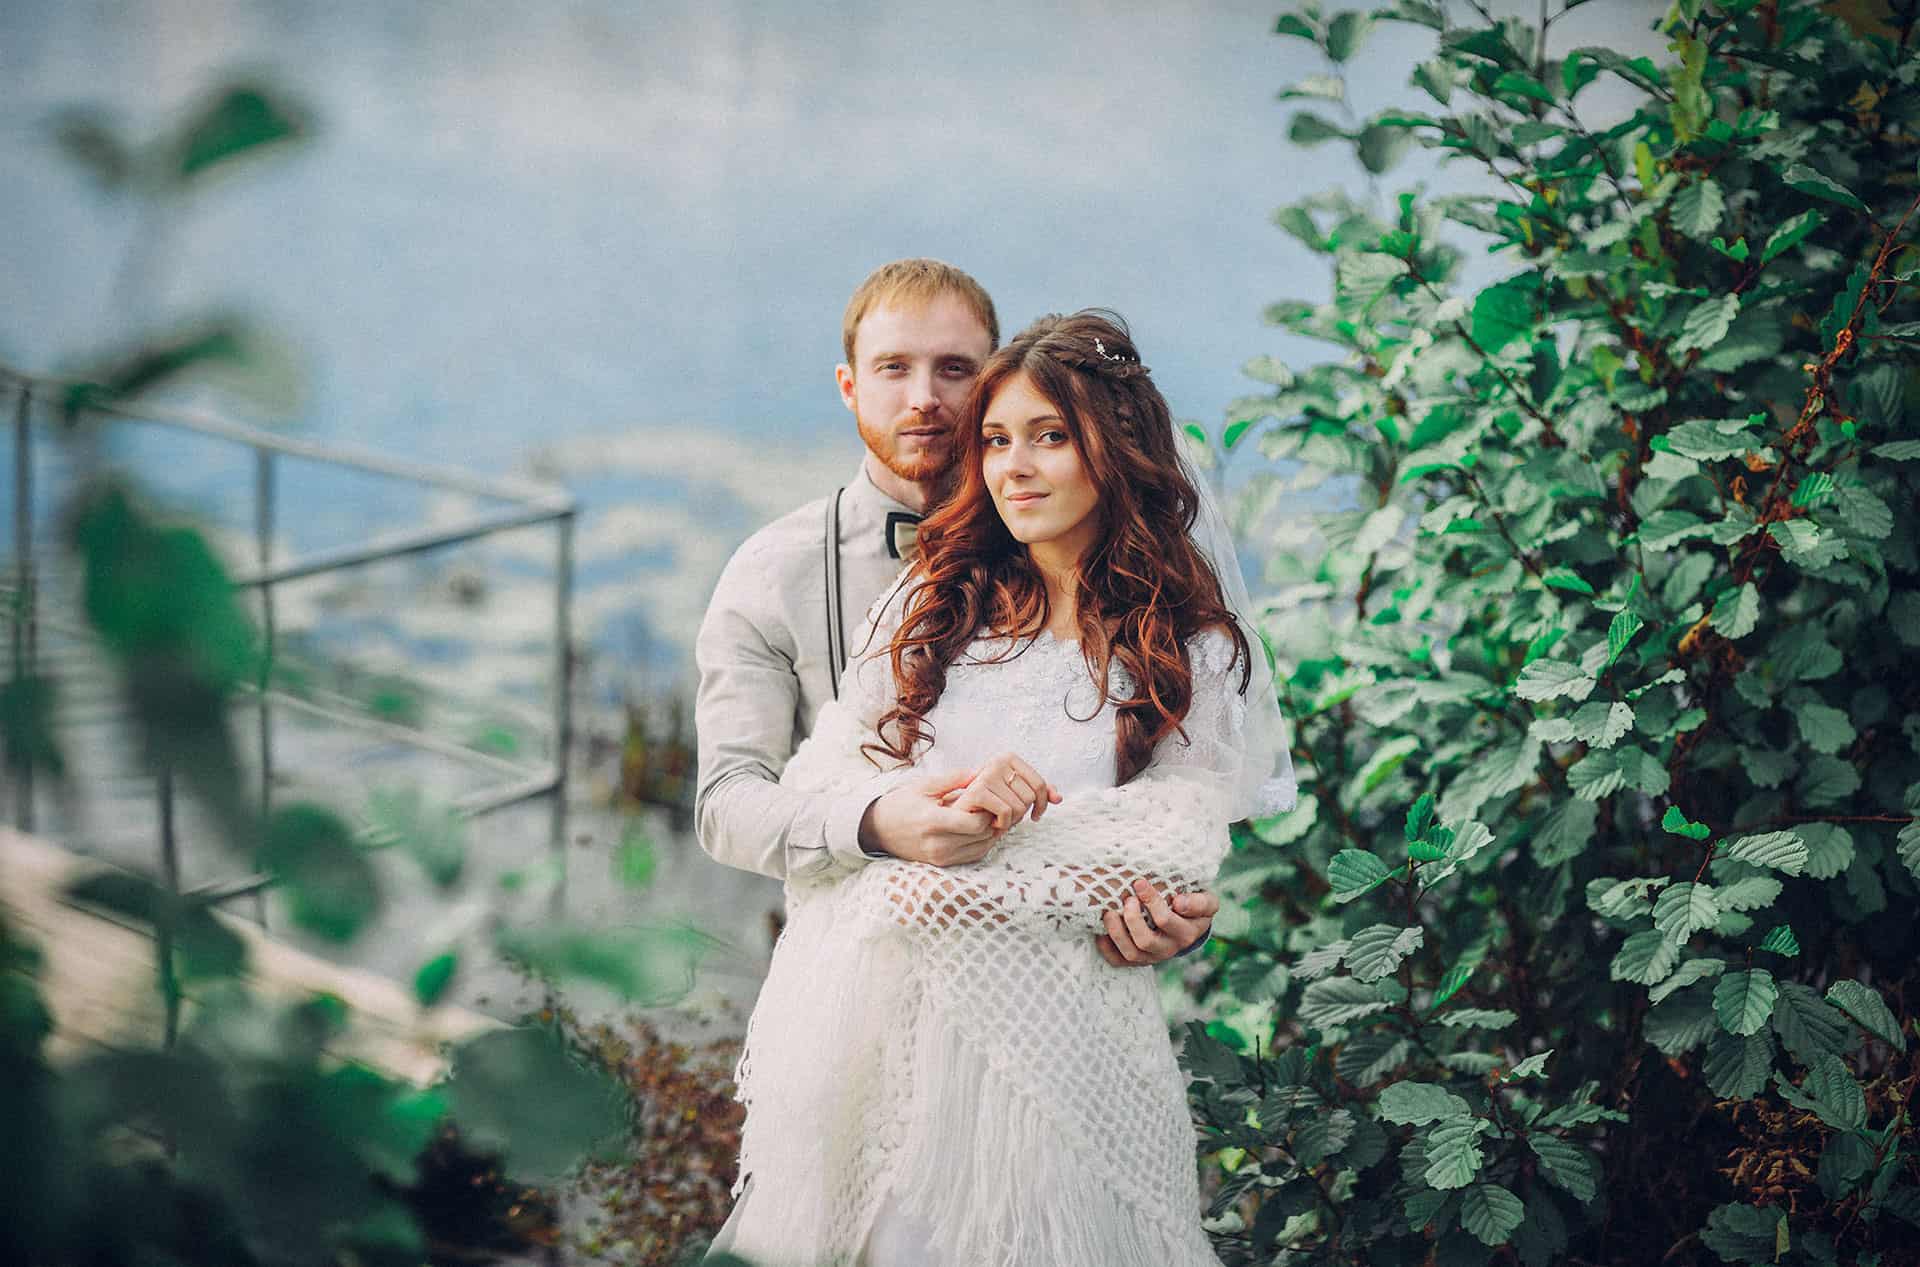
To follow this tutorial, load a wedding photo into Lightroom. It should have skin tones and green foliage so that you can see the color adjustments you’ll be making. Here’s the wedding photo that we’ll be using for this tutorial.
Step 2
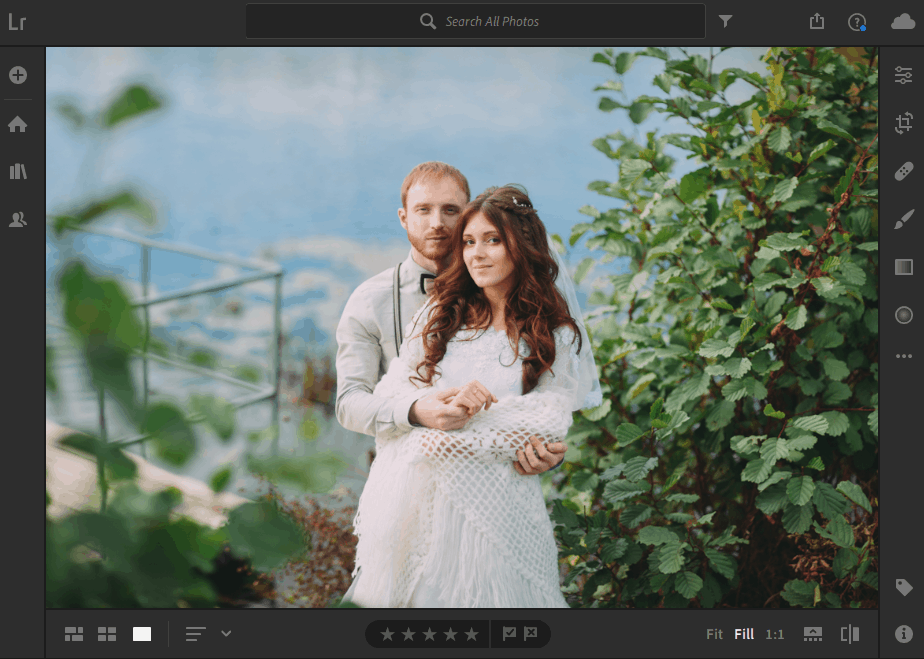
We’ll start off with the colors first. Because the human brain is less sensitive to color changes as it is to tonal/light changes, it’s a good idea to do your color adjustments first.
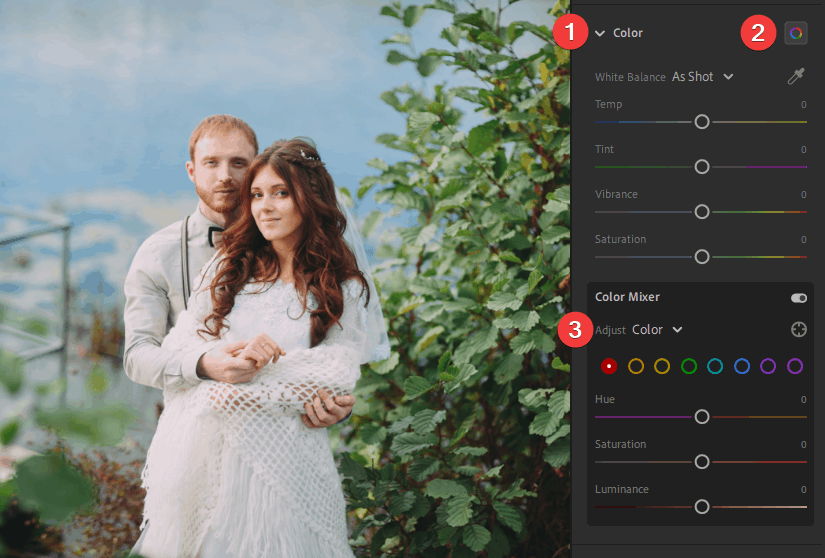
In the Edit panel, go to Color > Color Mixer. Select “Color” from the adjust drop-down menu.
Step 3
Edit the greens and start with the following settings:
- Hue: +60
- Saturation: -50
- Luminance: +60
Feel free to adjust the settings to suit your photo. The settings will shift the greens towards blue and give it a lighter and more neutral look. Many wedding presets use this combination to achieve a light and airy look where the green foliage doesn’t overpower the photo.
Step 4
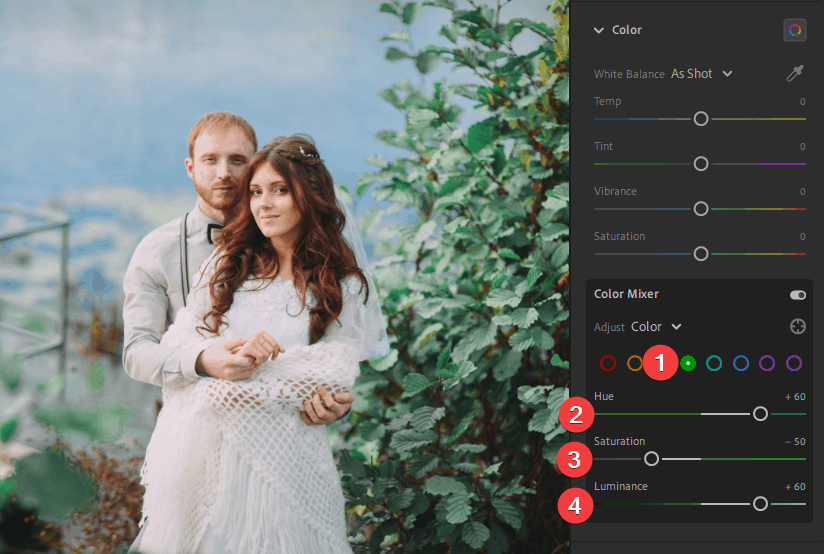
Next we’ll edit the yellows. Use the following settings:
- Hue: +60
- Saturation: -30
- Luminance: 0

These yellow settings help give the foliage a more consistent color.

Step 5
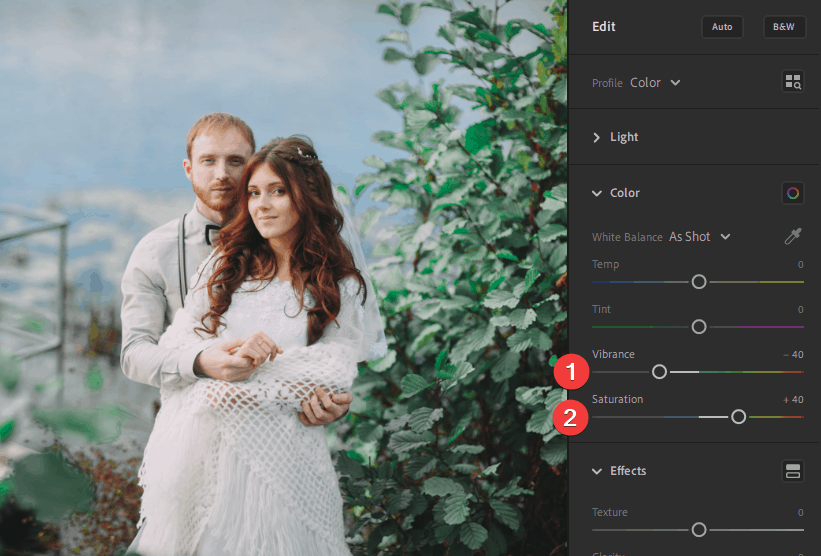
We’re done editing the greens and yellows. Now lets move on to the vibrance and saturation settings.
Set the vibrance to -40 and saturation to +40. These settings will give whites a cleaner look. You can use larger numbers for a stronger effect, but be careful that it does not gray out skin tones – this can happen on pale/light skin.
Step 6
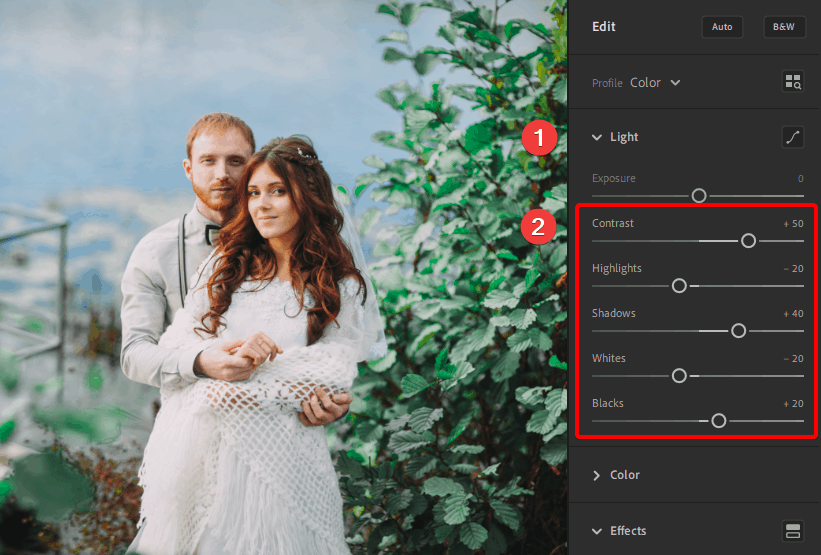
We’re done with the colors. Now let’s move to the light settings. Start with the following settings:
- Contrast: +50
- Highlights: -20
- Shadows: +40
- Whites: -20
- Blacks: +20
This will increase the contrast and make your photo pop slightly. When you increase the contrast, you should always edit the settings below to restore tonal details.
Step 7
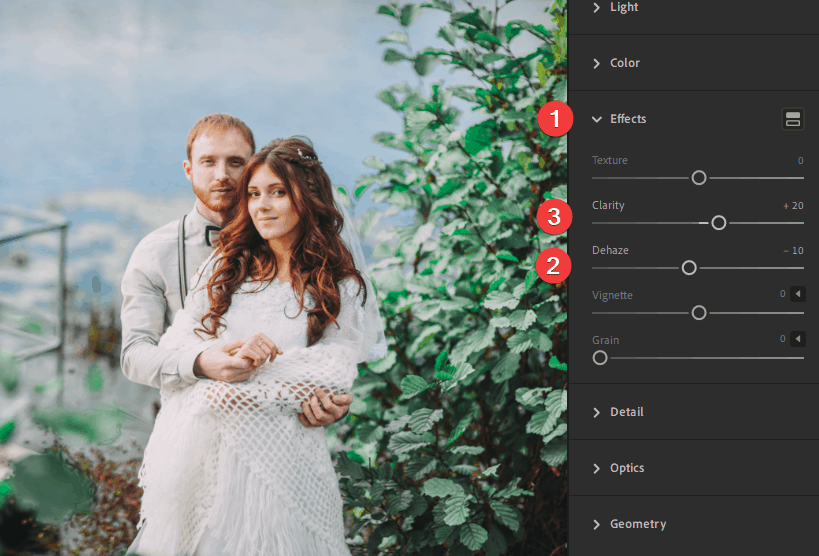
Now I’ll show you how to add a subtle glow to the wedding dress. Go to the Effects section and apply these settings:
- Dehaze: -10
- Clarity: ~+20 (Adjust this to bring back details)
This combination of settings gives a subtle glow. You can use larger numbers for a stronger effect but I prefer to keep this subtle – too much can make your photos look like the cheesy soft glow from 1995.
Step 8
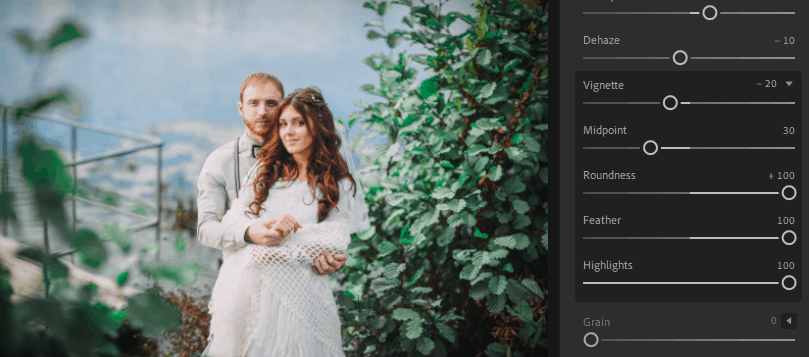
Now let’s add a vignette. In the same Effects section, click on the arrow on the right of the vignette settings. This will bring up all the vignette sliders.
When editing the vignette, start by setting the vignette it to -100 so that you can see the shape of it while you’re editing the other adjustments.
- Midpoint: 30
- Roundness: +100
- Feather: 100
- Highlights: 100
By default, the vignette is oval. By setting the roundness to +100, you’ll get a perfectly round vignette – just like real vignette from lenses.I like to set the highlights to +100 to make the vignette look not so obvious. You can edit the other settings however you like.
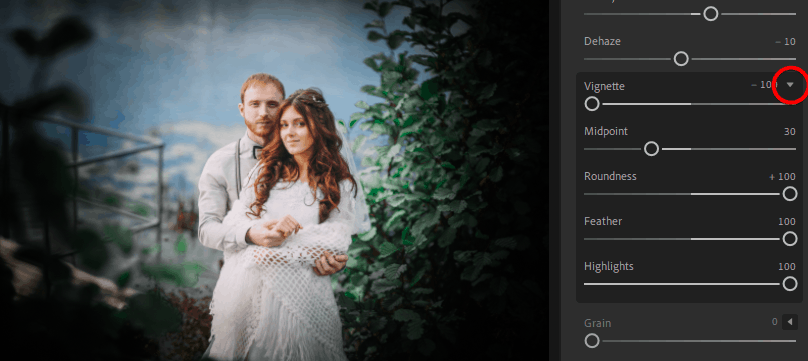
Once you’re happy with your vignette, go ahead and reduce the vignette strength to something more natural.
Step 9
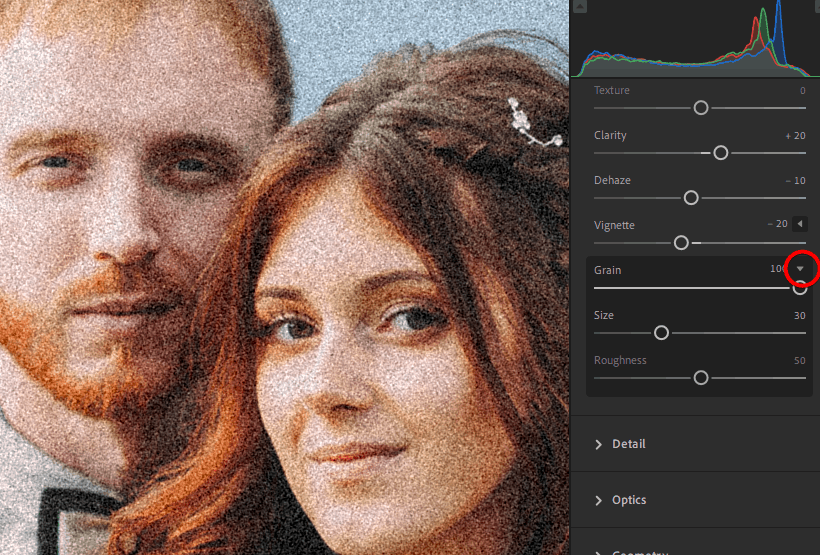
Finally, we’ll add a bit of grain. Click on the arrow to expand the grain settings.
Just like what we did with the vignette, start by maxing out the setting of your grain. This will let you see what’s happening when you make changes to the size and roughtness settings.
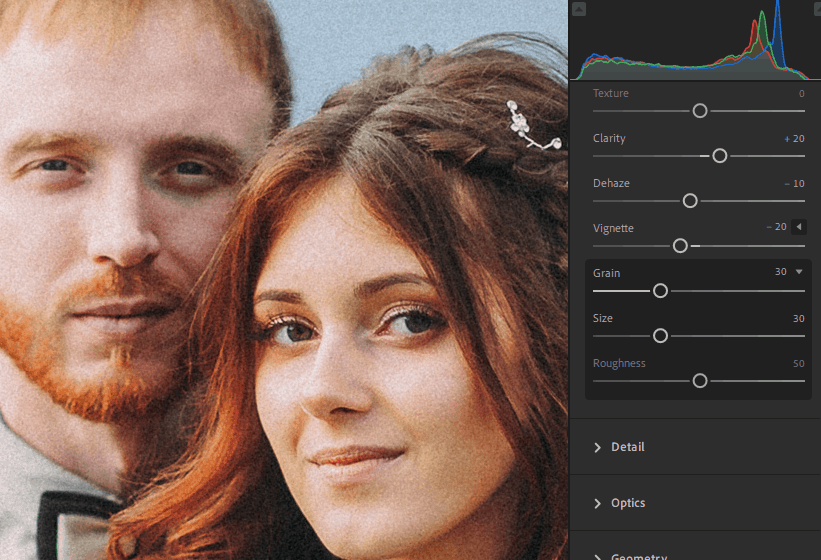
For my image, I set the size to 30. The higher you go, the more resolution you’ll lose. Using a setting around 30 will give a slight blur to emulate the lower detail of 35mm film. The roughness setting sets the size of the grain.
Once you’re happy with the settings, go ahead and reduce the grain to your desired level.
Step 10 (Optional)
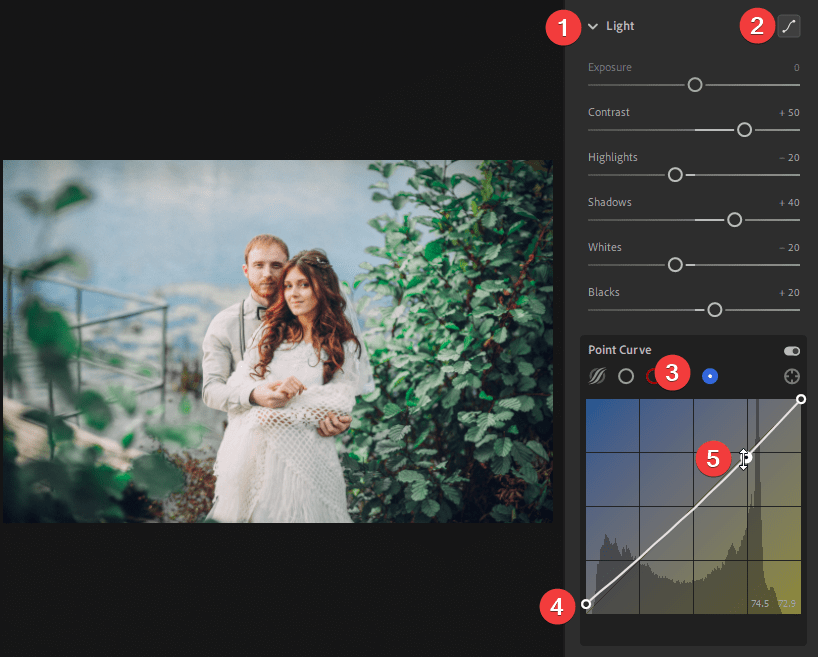
To give your photo a more vintage style, go to Light > Tone Curve > Blue Channel.
Start by dragging the bottom-left point upwards to tint the shadows blue. Next, add a point on the upper 3/4 of the line and drag down lightly to warm the highlights. Keep your adjustments small and subtle – too much can make the color grading look like an Instagram filter.
Final Results
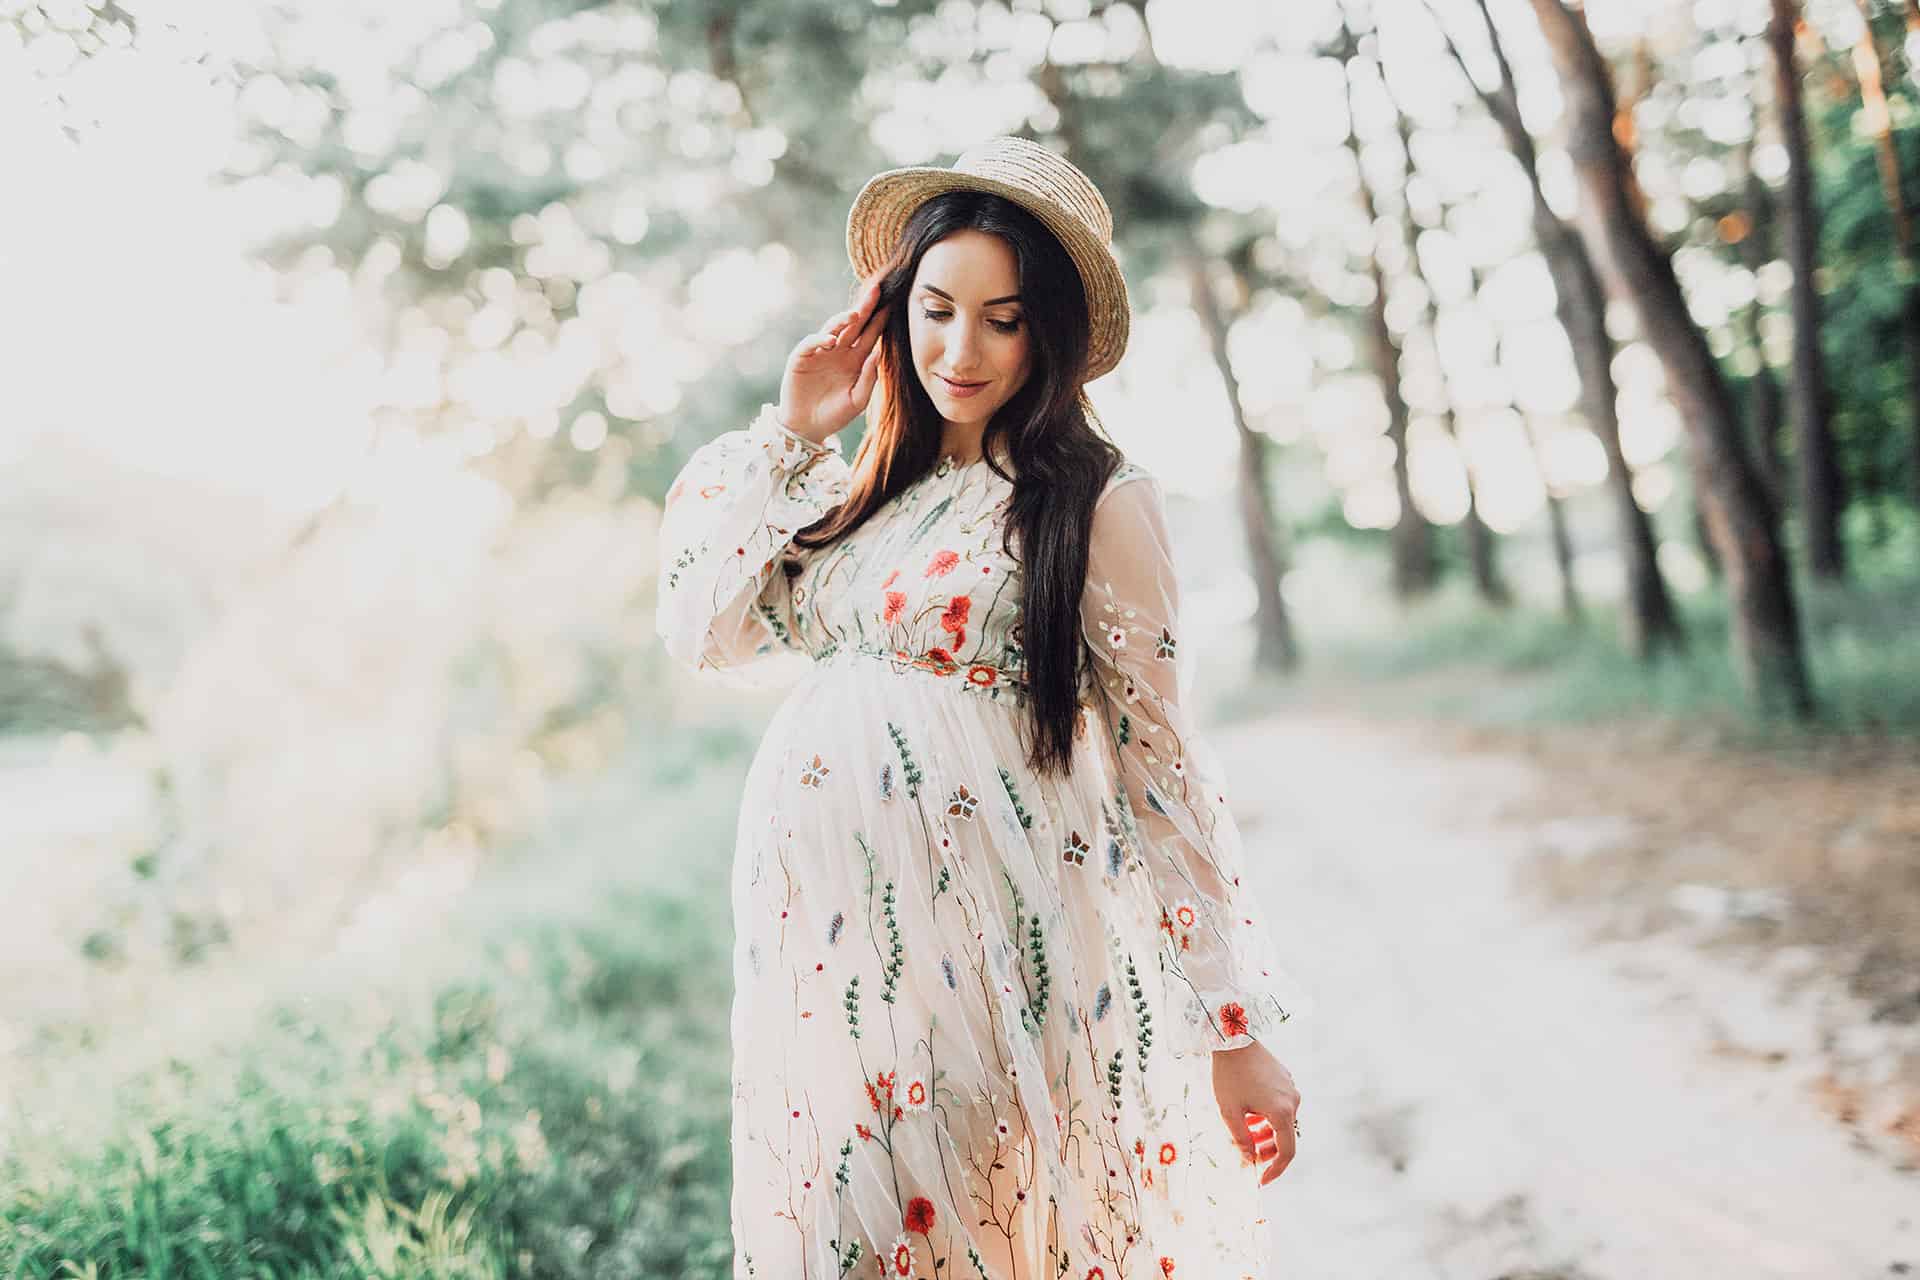
Done! Here’s how the image looks like before and after.



Leave a Reply