
Cityscapes at night can be a breathtaking experience, and they’re perfect for bold editing styles like this one. In this Lightroom tutorial, you’ll learn how to create fiery red city lights and a contrasting blue tone. You’ll start by creating a two-color red and blue look. Then, you’ll learn how to make colors pop with the Colorboost profiles. And for the final step, you’ll learn how to use to tone down the sky.
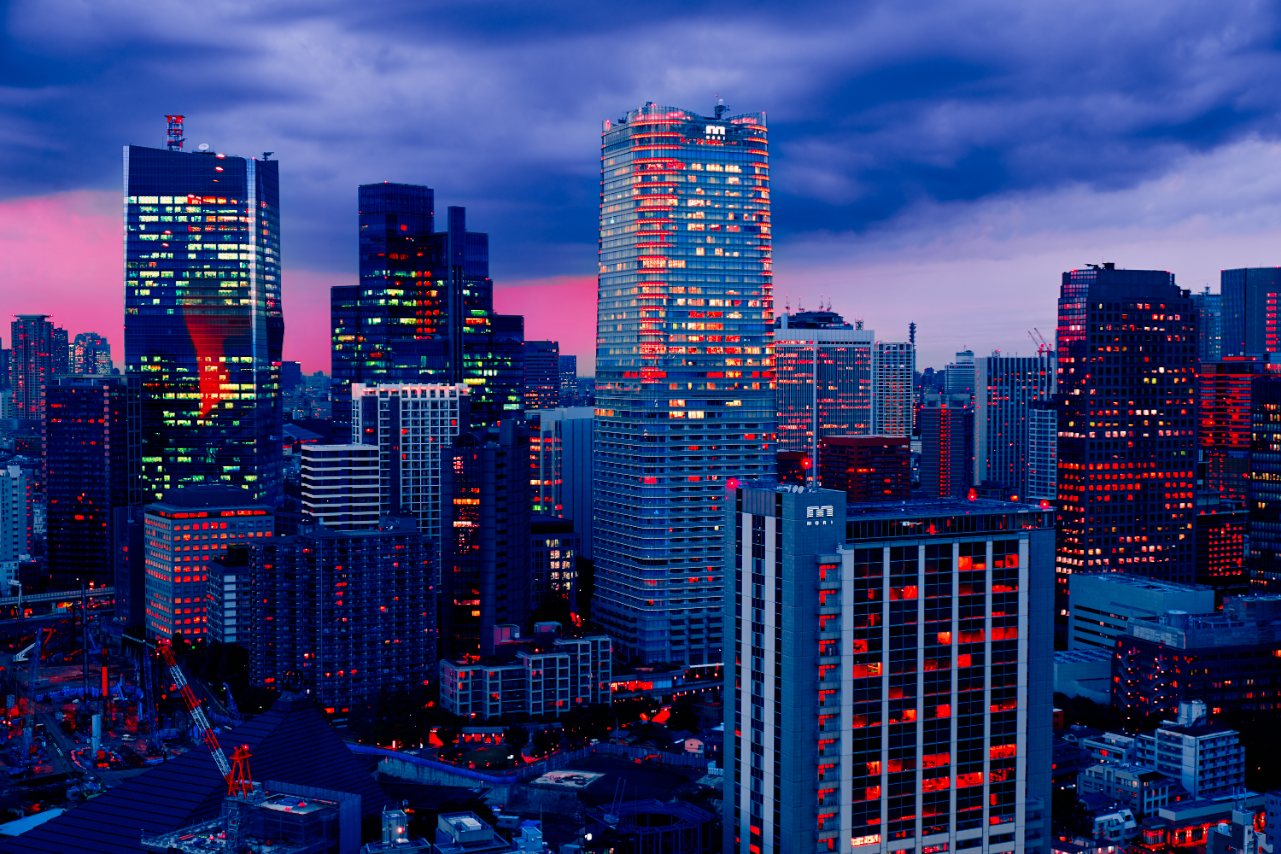
Preview of Final Results
This editing style gives your cityscapes a new twist with an intense red and blue look.

Starting Image
Find a photo that you want to edit. This style looks best on nighttime cityscapes like the one below. Here’s the image that we’ll be using.

Creating a Two Color Look
To start, we’ll create a two color look by shifting the hue. This will simplify the colors to (close to) two colors.
In the Color section, go to the Color Mixer.
- Click on the Adjust dropdown menu
- Select Hue

We can change the colors of this photo to red and blue. You can do this by moving the colors close to red towards it and the colors close to blue towards it.
Move the sliders as shown in the image below:
- Red: 0
- Orange: -100
- Yellow: -100
- Green: +100
- Aqua: +100
- Purple: -100
- Magenta: 100

Adding a Midnight Blue Tint
Now let’s add a midnight blue tint. To do this:
- Open the Color Grading tool
- Drag the shadows wheel towards blue (H: 230 S: 100)

The blue is a little bright. To make it a darker blue, drag the luminosity slider to the left.

Increasing the Vibrancy
To make the photo more vibrant, we will use a special profile that adjusts the colors of the photo without touching any gray or black areas. You can download this profile for free from the Colorboost website.

After downloading, extract the ZIP file and import the install the profiles by going to File > Import Profiles & Presets. Import the Lightroom CC\Voxcolor Colorboost.zip file.
Note: You can only install profiles & presets from Lightroom desktop. After installing, the profiles will sync to your mobile devices.

With the Colorboost profiles installed, click on the Browse All Profiles button in the Edit > Profile section.

Open the VOXCOLOR Colorboost folder and select VC. This profile will make your photo more vibrant. It won’t affect neutral colors.
Colorboost profiles explained:
- VC – Makes vibrant colors more vibrant
- NC – Makes neutral colors more vibrant
Unlike Vibrance and Saturation, it makes photos more vibrant without changing neutral areas. This feature is not available in Lightroom, so we need to use the Colorboost VC profile.

This is what the picture looks like with the Colorboost VC profile.

Toning Down the Sky
The sky looks unnatural. To fix this, we can create a mask to tone down the sky.
- Go to the Mask panel.
- Click on “Select Sky”.

After you make the Sky mask, move the Saturation slider left to tone down the sky.

To give the sky the same midnight blue:
- Enable the Colorize option
- Select a midnight blue like shown below.

Final Results
You’re done! Here’s how this style looks before and after.


Leave a Reply