Lightroom profiles are similar to Lightroom presets but solves several issues. First, you no longer have to hover over every preset to preview it. Lightroom’s profile browser gives you a thumbnail preview of all profiles. Second, there was no native way to adjust the opacity of Lightroom presets. Lightroom profiles have a new “Amount” slider which lets you adjust the profiles from 0-200%. But if you have Lightroom presets, how do you convert them into Lightroom profiles? In this tutorial, you’ll learn how to easily do that.
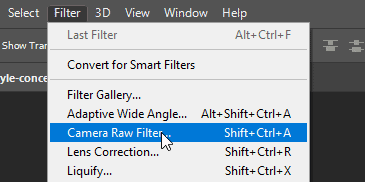
1. Open Photoshop CC’s Camera Raw filter.
Yes that’s right, you’ll need to do this in Photoshop CC. Go to Filter > Camera Raw filter.
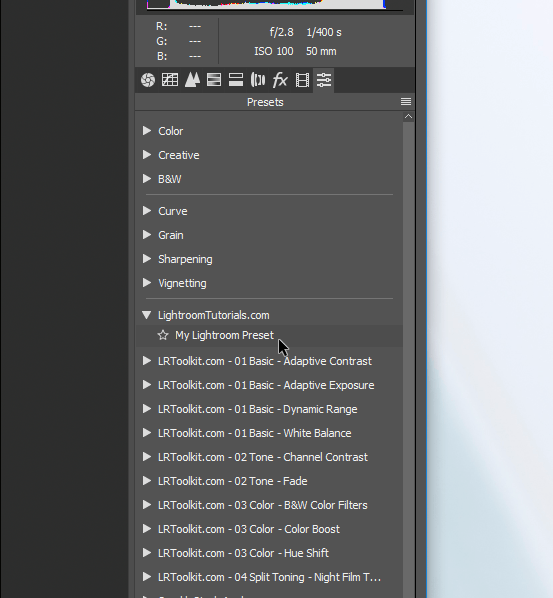
2. Apply your preset.
Go to the Presets tab and then click on the preset to apply it to your image.
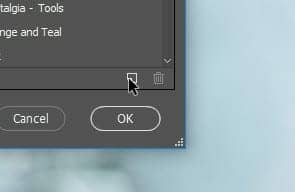
3. Access the hidden “New Profile” button.
Here’s the secret. The button is actually hidden as the “New Preset” button. This button lets you create a new Lightroom preset but if you hold the Alt/Option key, you’ll reach the “New Profile” tool instead.
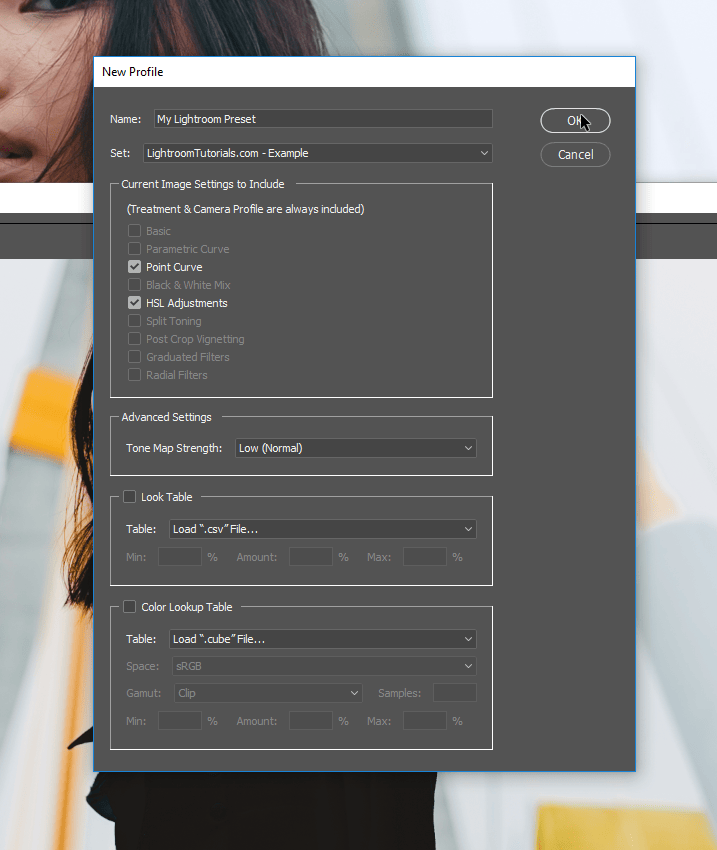
4. Create your Lightroom profile
Give your Lightroom profile a name. In the set dropdown menu, you can create your own set. This will appear as a folder inside Lightroom’s profile browser. Adobe recommends naming your set “YOUR COMPANY – product name”. It should automatically checkmark the options that you’ve used but in case there is any that you don’t want included, you can uncheck it. Click OK when you’re done.
5. Find your profile in Lightroom Classic CC
Once you hit OK, your profile will be accessible from Photoshop’s Camera Raw filter and Lightroom Classic CC in the same location (Profiles dropdown menu > Browse).
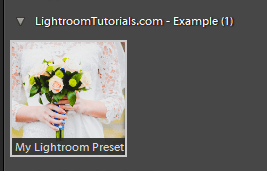
6. Load your profile in Lightroom CC
The profiles won’t show up automatically in Lightroom CC. Instead, you must load it. First, you’ll need to place the profile into a ZIP file. Browse to the location
- Windows: C:\Users\<username>\AppData\Roaming\Adobe\CameraRaw\Settings
- Macs: /Users/<username>/Library/Application Support/Adobe/CameraRaw
Find the XMP file then compress it to ZIP file. Once zipped, open Lightroom CC, press E to open the Edit panel. Click on the Browse button.

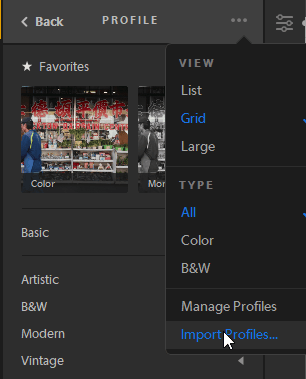
Click on the panel menu then select “Import Profiles”. Browse for the ZIP file then click OK.
Lightroom Presets vs Profiles
The main differences between Lightroom presets and Lightroom profiles is that profiles are shown with thumbnail previews and they let you adjust the opacity. However, you will not be able to edit the individual develop settings like you can with Lightroom presets.
For advanced colorists, Lightroom profiles also let you load color lookup tables. This lets you create color grading beyond what is possible with Lightroom’s develop settings. For example,?VOXCOLOR’s Colorboost profiles let you increase your photo’s vibrance while keeping gray areas gray – something that can’t be done with vibrance or saturation. We’ll show you how to do this in a future tutorial.




Leave a Reply