Create a striking look that will make your followers ask you how it’s done – if they do kindly link them back to this tutorial please :). In this Lightroom tutorial, you’ll learn how to create deep black tones and vibrant reds using Lightroom’s color mixer. Then you’ll learn how to crush the blacks then bring back the shadow details. And finally, you’ll finish it off with some effects.
Preview of Final Results


Step 1
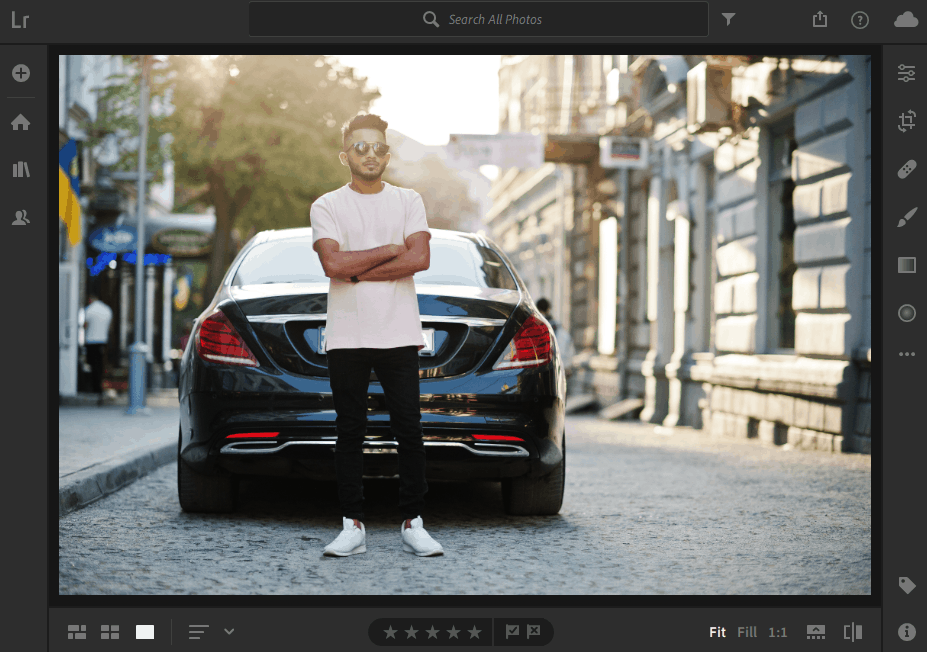
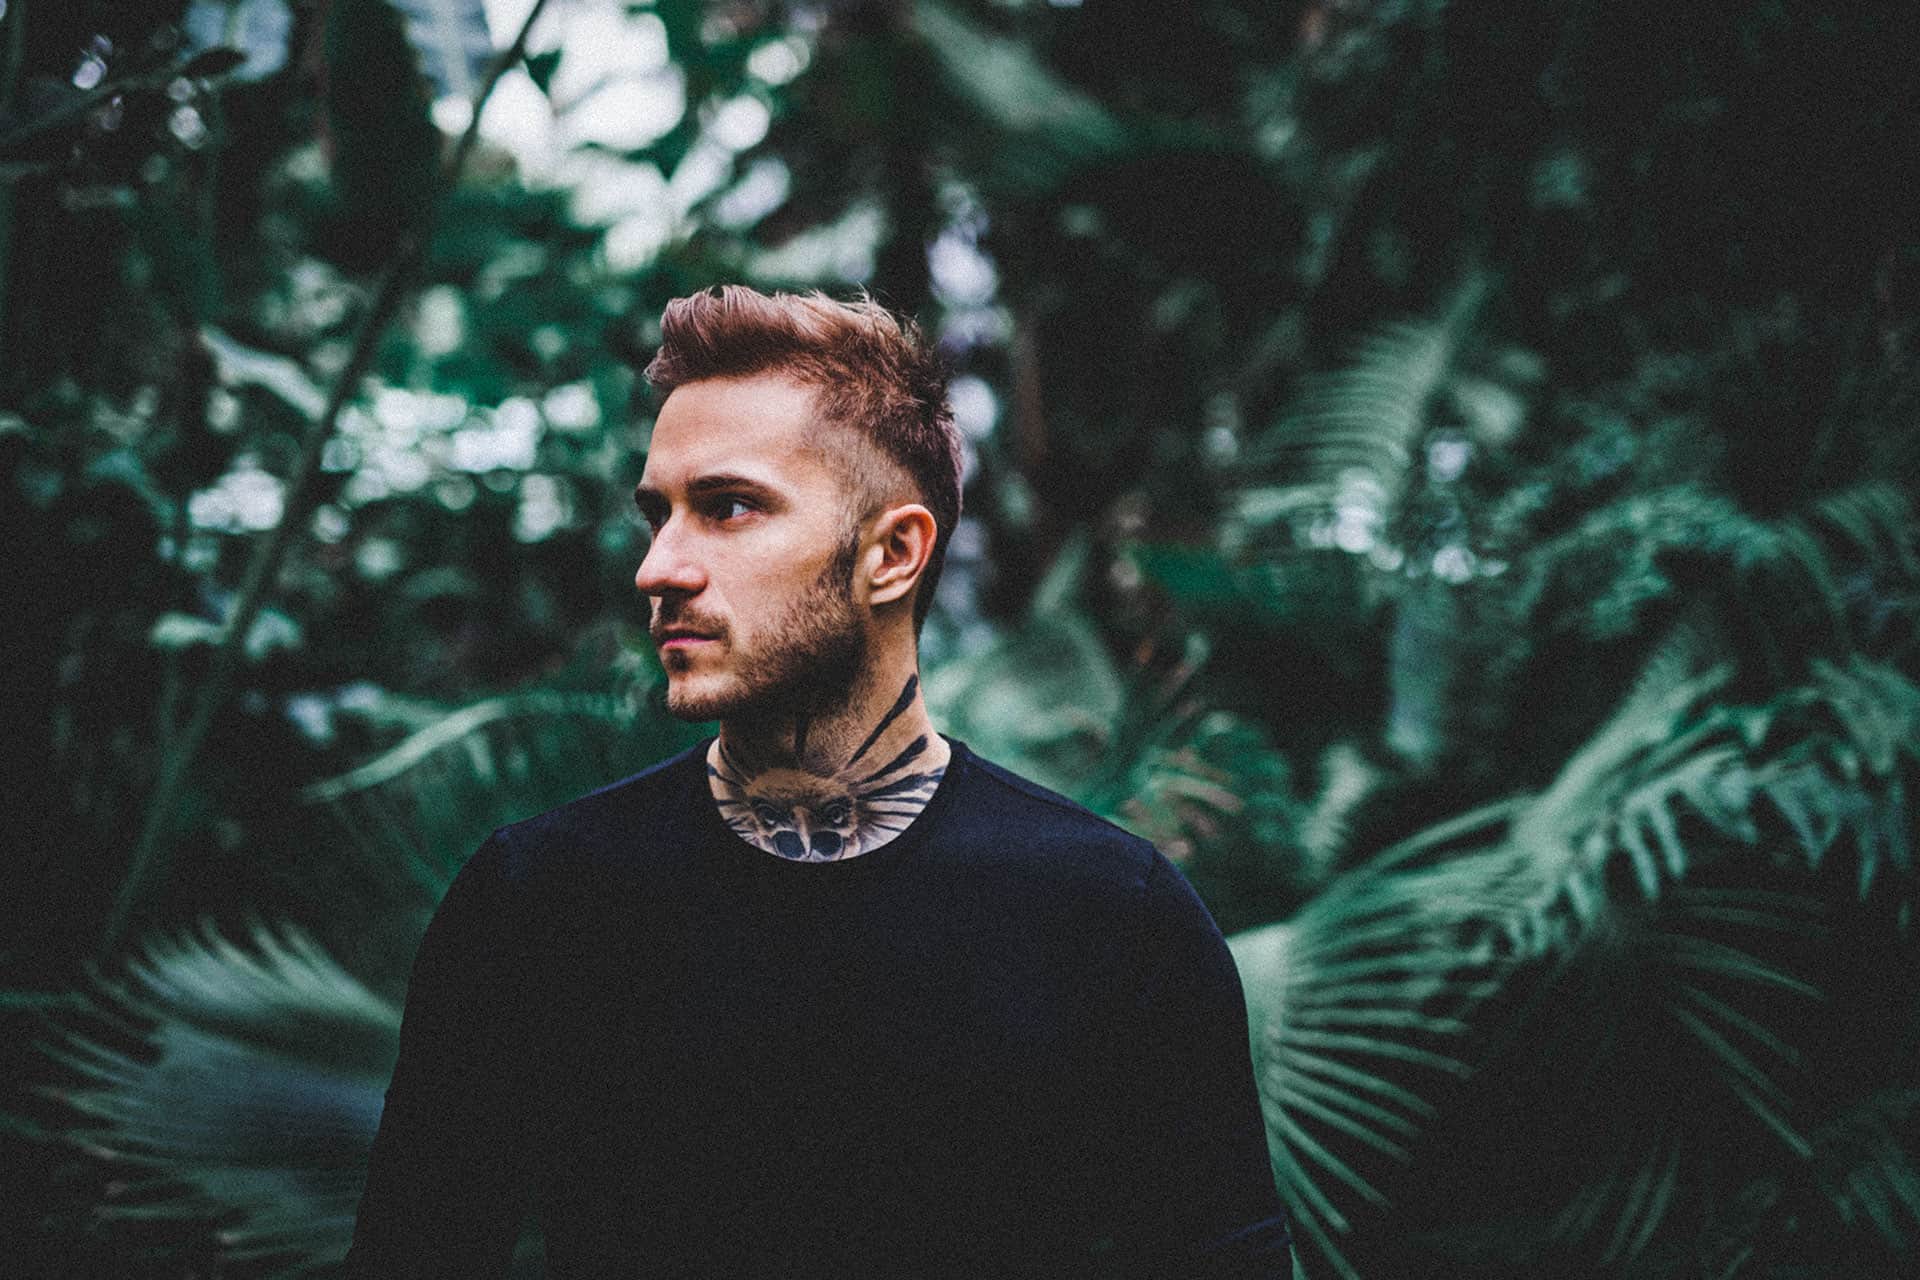
Here’s the image that I will be using for this Lightroom tutorial. You should pick an image with reds like the taillights in the photo below.
Step 2
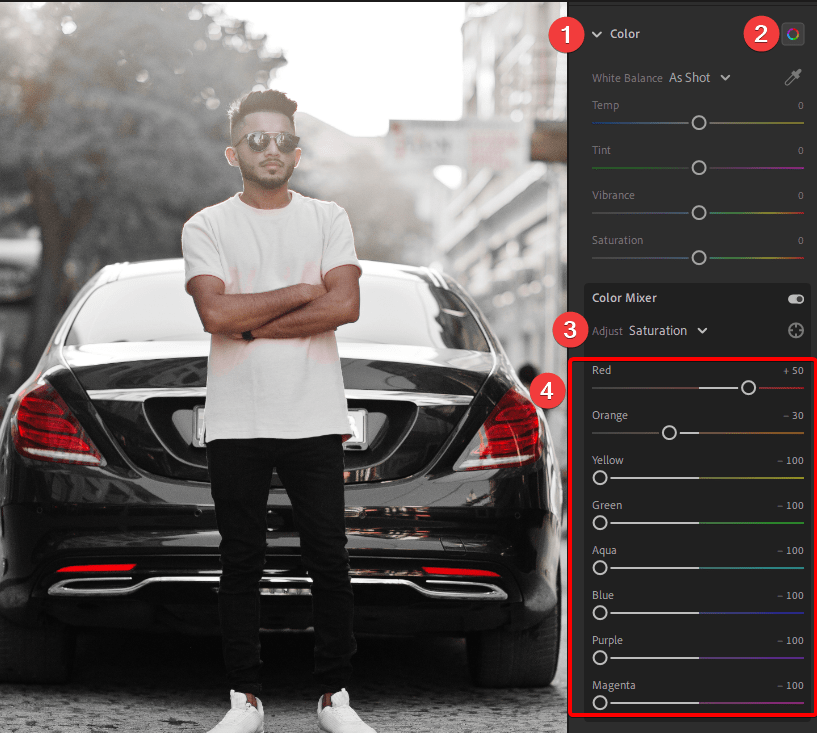
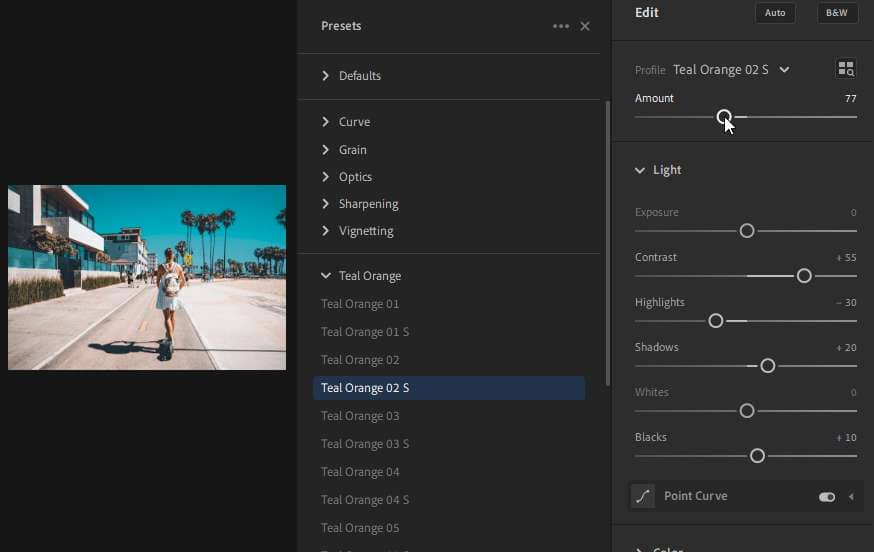
Go to the Color > Color Mixer. In the Adjust dropdown menu, select Saturation. Set the saturation to -100 for the colors from Yellow to Magenta.
For the orange, set this to -30. We’re desaturating the oranges less so skin tones don’t turn overly pale.
Finally, make the reds pop by bumping the Red setting to +50.
Step 3
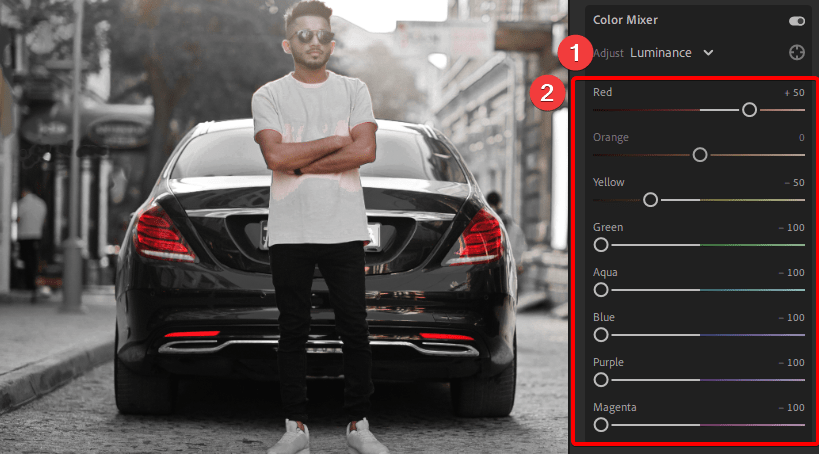
Next, switch to Luminance from the Adjust dropdown menu.
We’re going to darken all the colors except for the ones around orange.
- Red: +50
- Orange: 0
- Yellow: -50
- Green: -100
- Aqua: -100
- Blue: -100
- Purple: -100
- Magenta: -100
The orange setting is 0 to protect skin tones. For the yellow, we set it to -50 so that the luminance fades smoothly between the greens and oranges. If you set the Yellows to -100, you’ll get posterization.
Step 4
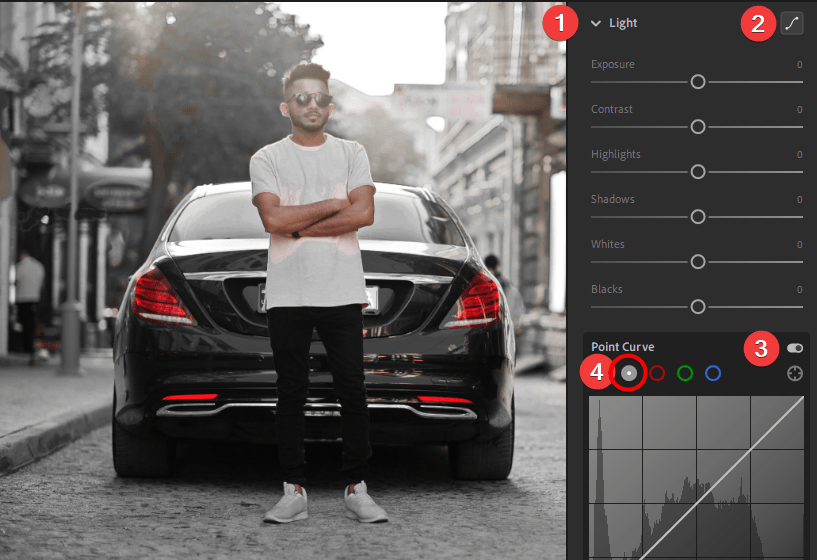
Now let’s adjust the tones. Go to Light > Tone Curve. In the tone curve, click on the gray circle which will switch it to Point Curve mode. The point curve lets you have full control which we will be needing for this step.
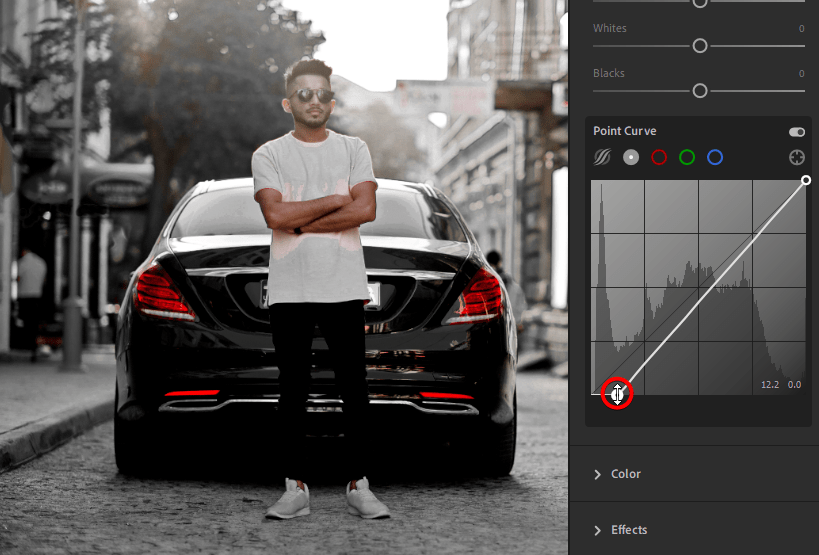
Step 5
In the Point Curve, drag the bottom-left point towards the right. This will crush the shadows to give you the intense deep blacks as you can see in the image below.
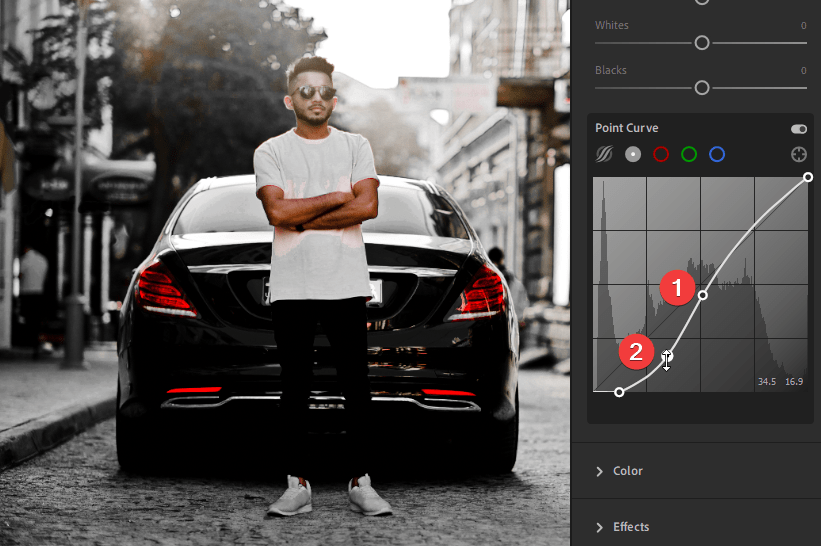
Next, add two points like shown in the image below. Drag the 2nd point downwards to create an s-curve. This s-curve will increase the contrast of your photo.
Step 6
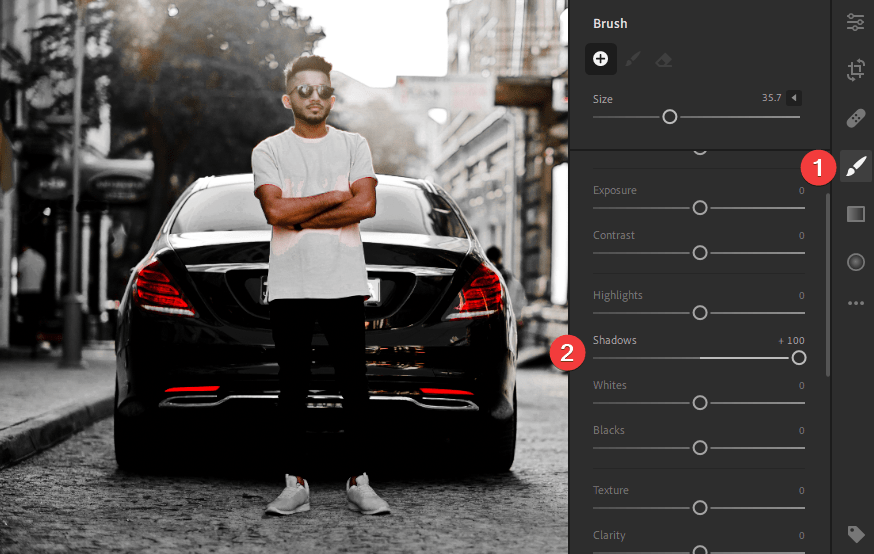
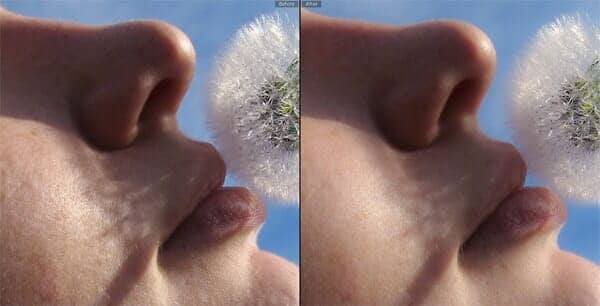
We’re done with the tone curve. You’ll notice that in our photo, the details of the car has been completely merged. To fix this, switch to the Brush tool and set the Shadows to +100.
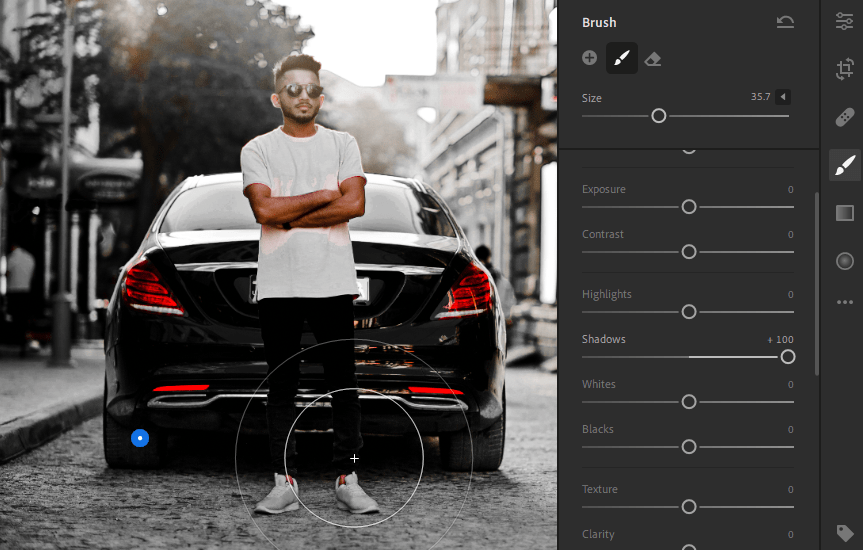
Paint over the dark areas to reveal the details. You can go over the same area in multiple-passes to increase the effect. As you can see with our image below, the details are much more visible now.
Step 7
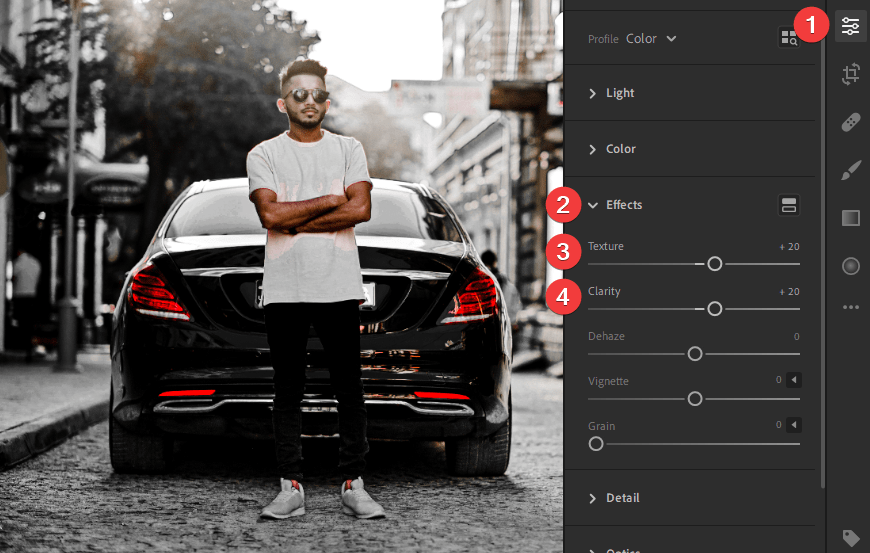
And finally, for the finishing touches, go back to the Edit area. In the Effects section, adjust the texture and clarity setting to give your photo a sharp look.
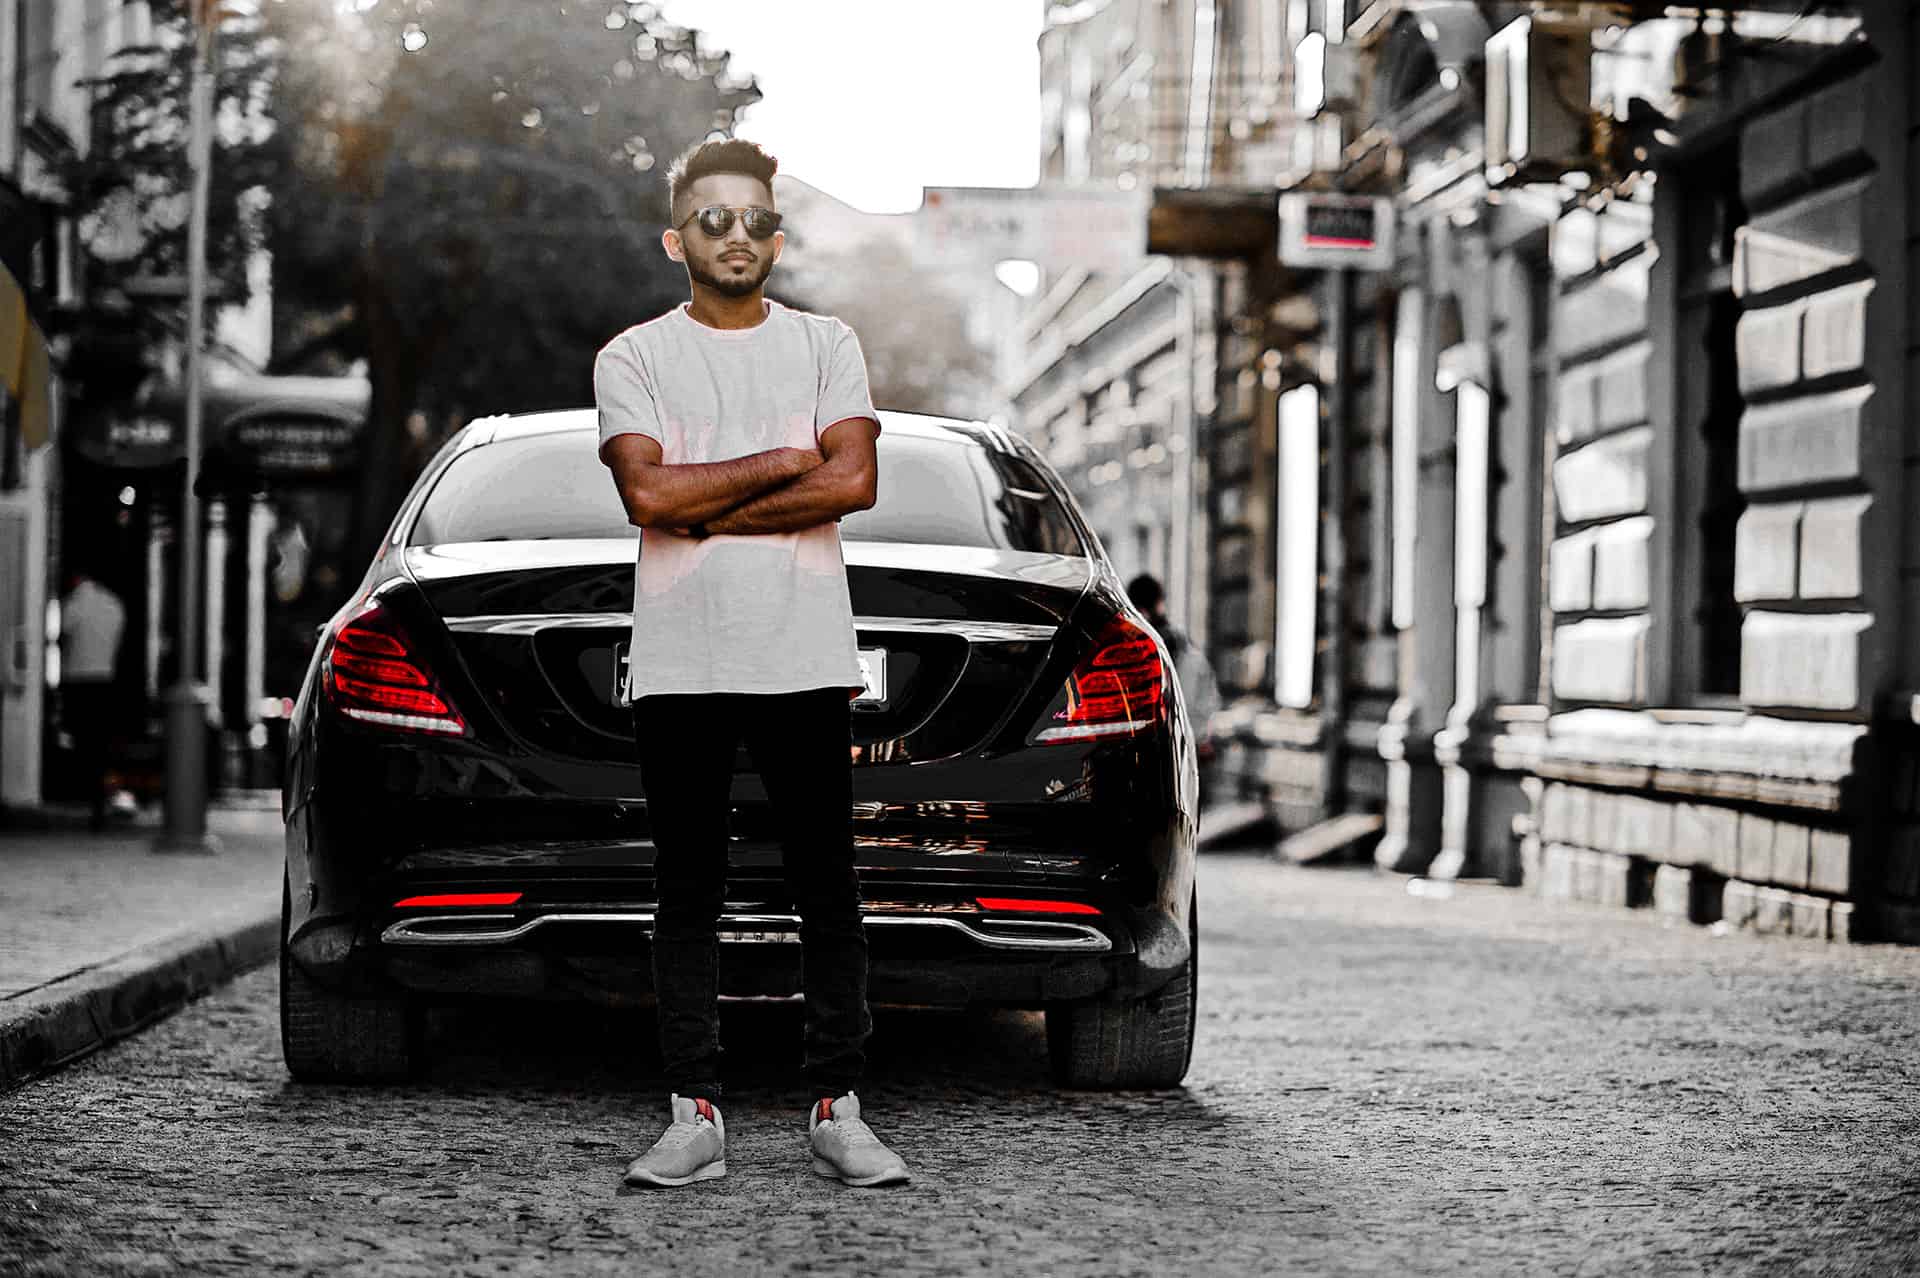
Final Results
You’re done! Here’s how the image looks like.


Leave a Reply to AnonymousCancel reply