Lightroom has no option to invert photos but using an easy trick with the Tone Curve, you can invert any photos you like! This is great for giving your photos an x-ray look or even to simply invert your slides/film/scans back to their original colors without having to go through Photoshop.
Lightroom CC & Classic CC Users: We have new Lightroom profiles for inverting photos. Download them here.
Step 1
Select the photo then go into the Develop module.
Step 2
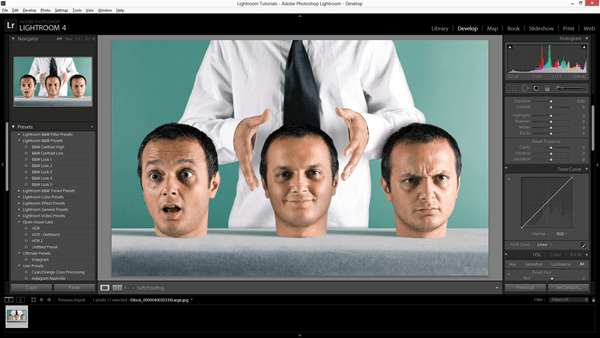
Go into the Tone Curve area in the Develop module.

Step 3
All you need to do is invert the tone curve! Lightroom's tone curve is finicky and always snapping back. You can't just adjust the curve as you like but follow the steps that we did in the images below and you'll easily create an inverted tone.


Step 4
If you have a lot of photos to invert, this would be a lot of work. To save time, you can save your Tone Curve. Click on the Tone Curve dropdown menu and click Save. Give it a name, we recommend "Invert". Now you can invert photos simply by choosing the profile you just created.

Final Results